Stress-Free Dog Nail Trim Checklist for Calm, Safe Trims
Calm, Safe Dog Nail Trims Start With a Simple Checklist
Regular nail care helps dogs move comfortably, protects floors and furniture, and prevents painful splits. A step-by-step routine also reduces “surprise factor” stress—especially for nervous dogs or for dark nails where the quick is hard to see. The goal isn’t a perfect trim in one sitting; it’s building a repeatable, low-drama habit that keeps nails at a healthy length over time.
Why Nail Trims Matter (Beyond Looks)
Nails that get too long can affect how a dog stands and walks. Over time, that subtle change in posture and gait can add stress to joints and soft tissues—especially in active dogs and seniors.
- Overgrown nails can change posture and gait, stressing joints over time.
- Long nails are more likely to snag, split, or tear, which can be painful and bleed.
- Clicking nails on hard floors often means they’re too long for many dogs.
- Consistent trims can help the quick recede gradually, making future trims easier.
For a veterinarian- and trainer-aligned overview of safe trimming basics, see guidance from American Kennel Club and VCA Animal Hospitals.
Before You Start: Supplies and Setup Checklist
Most nail-trim problems start with poor visibility, slippery footing, or rushing. Set up once, then reuse the same “nail station” so your dog knows what to expect.
- Choose the right tool: scissor-style or guillotine clippers, or a nail grinder (often easier for small trims).
- Keep styptic powder or cornstarch nearby for minor bleeding, plus gauze/cotton pads.
- Use high-value treats and a lick mat or stuffed toy to create a positive association.
- Pick a stable, well-lit location; add a headlamp or flashlight for better visibility.
- Use a non-slip mat and calm background noise to reduce startle responses.
- Have a second person available for treat delivery and gentle support if needed.
Quick Prep Checklist
| Item | Why it helps | Notes |
|---|---|---|
| Clippers or grinder | Controls trim size and finish | Grinders support tiny, gradual reductions |
| Styptic powder/cornstarch | Stops minor bleeding quickly | Apply gentle pressure for 30–60 seconds |
| Bright light | Improves quick visibility | Flashlight under nail can help on lighter nails |
| High-value treats | Builds calm cooperation | Tiny pieces for rapid reward |
| Non-slip surface | Prevents slipping and panic | Yoga mat or rubber bath mat works well |
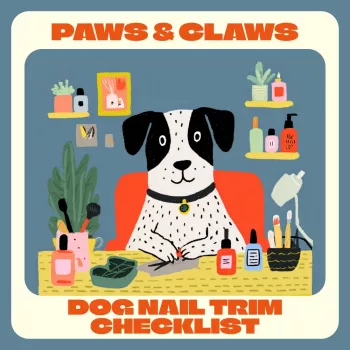
If you want a ready-to-follow routine you can reuse every week, the Paws & Claws: The Ultimate Dog Nail Trim Checklist is designed for short sessions and nervous dogs. For owners working on calmer handling habits overall, Confidence, Not Ego – Checklist can be a helpful companion mindset tool for staying steady and consistent during training moments.
Step-by-Step Nail Trim Checklist (Clip or Grind)
Keep sessions short and predictable. A dog who trusts the routine will offer paws more willingly over time.
- Start with handling. Touch a paw briefly, treat, and release. Repeat until your dog’s body looks soft (loose jaw, normal breathing, no pulling away).
- Check each paw. Look for cracked nails, redness, swelling, or sores before trimming.
- Identify the quick. On light nails, it’s the pink center. On dark nails, assume it’s close and work in micro-trims.
- Trim in small increments. Take tiny slivers rather than aiming for a big cut.
- Use the right angle. Follow the natural curve and remove just the tip so you don’t compress the nail toward the quick.
- If grinding: Use short pulses, pause to prevent heat buildup, and check progress often.
- Reward frequently. After each nail—or each micro-trim—deliver a treat to keep cooperation high.
- Stop early if stress rises. If your dog stiffens, pants, yanks the paw, or whale-eyes, pause and finish the remaining nails later.
How to Cut an Uncooperative Dog’s Nails Without a Struggle
“Uncooperative” usually means the dog is worried, uncomfortable, or unsure what’s coming next. The fix is often a consent-based routine: predictable steps, short sessions, and rewards that arrive fast.
- Use a consent-based approach: ask for a paw, trim briefly, reward, then release.
- Desensitize in layers: paw touch → tool in sight → tool touches nail → one nail per session.
- Try supportive positioning: side-lying on a mat; small dogs on a stable table with a non-slip surface; or seated between your knees.
- Add calm enrichment: a lick mat or long-lasting chew to occupy the mouth while you work.
- Avoid force. Restraint that triggers panic can worsen nail-trim fear long-term. For humane handling tips, see ASPCA resources.
- Use cooperative tools: grinders for micro-removal; scratch-board training for some front nails.
- Choose professional help when needed: if there’s snapping, extreme fear, or you can’t trim safely, schedule a groomer or vet visit and ask about anxiety-reduction options.
How to Cut Dog Nails That Are Black (Safer Micro-Trim Method)
With black nails, the key is to “sneak up” on the length using tiny cuts and frequent checks.
If You Cut the Quick: What to Do Immediately
A Simple Maintenance Schedule That Keeps Nails Short
Printable Checklist and Guided Routine
For a reusable, print-friendly routine that includes prep steps, calm-handling sequence, black-nail precautions, and quick-bleed reminders, see Paws & Claws: The Ultimate Dog Nail Trim Checklist.
FAQ
How to cut an uncooperative dogs nails
Use short, consent-based sessions with high-value rewards and stop before your dog panics. Build up gradually (paw touch, tool touch, one nail at a time), try a supportive position on a non-slip mat, and consider a groomer or vet if fear or aggression makes trimming unsafe.
How to cut dog nails that are black
Take micro-trims and check the cut surface after every snip; stop when you see a small dark/moist center that suggests you’re close to the quick. Bright light and a grinder can help you remove tiny amounts safely, and frequent sessions encourage the quick to recede.


Leave a comment